Bathroom Model
How the Idea developed
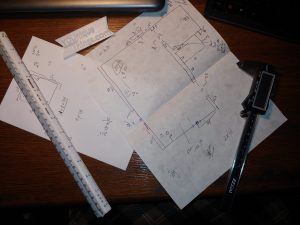
The Idea to Concept
A friend wants to remodel his bathroom. So we talked about his “idea” and got his intent pretty well defined. Then we made a sketch and took a bunch of measurements.
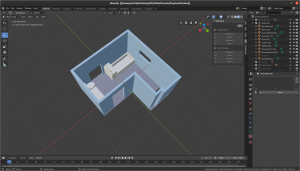
Converting into 3D
Next, to the 3D graphics software and input the sketched elements using measurements of 1mm to 1 inch to scale model of the bathroom. Before I could take this to the printer I had to:
- Have the software check to see if model is 3D printable
- Export the design to a .STL file for the next step.

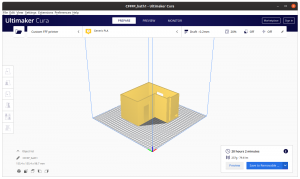
Prepare to Print
Once you have a graphics image you have to translate it into instructions that the 3d printer can understand. This is called “slicing” and there is software that takes the characteristics of the Printer, the material being used as “ink” and the design to produce the instructions for the 3d printer . NOTE: The bottom right corner gives you an estimate of how long it will take the object to print.
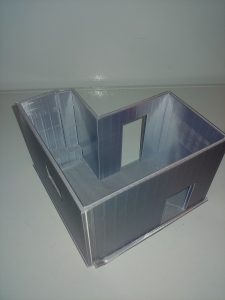
Print it
Next you get printer loaded with the filament (“ink”) and setup. Then load the instructions file (gcode) into the printer and start. Now all you have to do is wait and check, wait and check and more waiting and checking. This model actually took 1 day plus about 7 hours to finish.
The fixtures (vanity, toilet, cabinets, and tub) were printed separately so they could be moved around to try different placements.

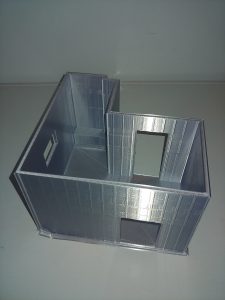
The Result
The scale model gave everyone a very clear idea of what the project goal was. It was even used to mark-up placement of electrical, mechanical, and plumbing elements. It reduced the amount of confusion significantly.
With the scale model they had no problem explaining the concept to the contractor. Further it made communicating with all the finish venders (flooring, cabinets, painter, etc) much easier.